IP address Apache access logs
If You want find out which ip address occurs the most in apache logs (to determine bot attack) run :
cat access_log | awk '{print $1}' | sort | uniq -c | sort -n | tail
To determine if given IP occurs in iptables rules:
iptables -L -n -v | grep [ip_address]
That helped me a lot lately…

OS X – Scheduled files cleanup
Do You like Your ~/Downloads folder ? Is it always clean and well organised ? Mine never was … Over time it got so messy that it was easier to download something again that look for it in ~/Downloads…
I came up with an idea of scheduled folder cleanup, but because in OS X cron is not available by default I had to figure it out the OS X way.
First I wrote a script for cleanup in ~/bin/download-cleanup :
#!/bin/bash

find /Users/[username]/Downloads -mtime +30 -print0 | xargs -0 rm -rf
This script looks for files older than 30 days and deletes them.
Now lets schedule it. Create file under ~/Library/LaunchAgents/pl.jusz.gen.DownloadCleanup.plist
<?xml version="1.0" encoding="UTF-8"?>
<!DOCTYPE plist PUBLIC "-/Apple/DTD PLIST 1.0/EN" "http:/www.apple.com/DTDs/PropertyList-1.0.dtd">
<plist version="1.0">
 <dict>
 <key>Label</key>
 <string>pl.jusz.gen.DownloadCleanup</string>
 <key>ProgramArguments</key>
 <array>
 <string>/Users/[username]/bin/download-cleanup</string>
 </array>
 <key>StartInterval</key>
 <integer>43200</integer>
 </dict>
</plist>
You can now register Your plist file with launchd:
launchctl load ~/Library/LaunchAgents/pl.jusz.gen.DownloadCleanup.plist
If You want to manually invoke Your script through launchd:
launchctl start pl.jusz.gen.DownloadCleanup.plist

How to install Redmine 2.5 on CentOS 6.5
This installation assumes that You have already Apache 2.2 and MySQL 5.x up and running.
Ruby 2.1
For whole operation we’ll need to install Development Tools, which can be done by:
yum groupinstall development
Then we’ll install ruby 2.1.x via rvm
curl -L get.rvm.io | bash -s stable
source /etc/profile.d/rvm.sh
Now we’ll have to reload rvm and install ruby
rvm reload
# this will install newest tag from 2.1 branch
rvm install 2.1
Now we want to make this version as default and this is done by:
rvm use 2.1.x --default
Phusion Passenger
To run Redmine we’ll need Passenger with it’s Apache module.
gem install passenger
passenger-install-apache2-module
Installer will guide You through process. At the end You’ll need to add /etc/httpd/conf.d/passenger.conf :
LoadModule passenger_module /usr/local/rvm/gems/ruby-2.1.1/gems/passenger-4.0.41/buildout/apache2/mod_passenger.so
<IfModule mod_passenger.c>
    PassengerRoot /usr/local/rvm/gems/ruby-2.1.1/gems/passenger-4.0.41
    PassengerDefaultRuby /usr/local/rvm/gems/ruby-2.1.1/wrappers/ruby
</IfModule>
Of course versions may vary depending on when You’re doing this. Installer will however give You this details.
Redmine 2.5
Download latest version from Redmine official webpage by wget and untar it:
wget http://www.redmine.org/releases/redmine-2.5.1.tar.gz
tar xzvf redmine-2.5.1.tar.gz
mv redmine-2.5.1 /var/www/html/redmine
Now it’s time to configuration. Let’s start from database. Edit config/database.yml and pass there Your database credentials
production:
 adapter: mysql2
 database: redmine
 host: localhost
 username: redmine
 password: redmine
 encoding: utf8
Next we’ll setup mail delivery data. Edit config/configuration.yml
production:
 email_delivery:
 delivery_method: :smtp
 smtp_settings:
 address: "localhost"
 port: 25
 authentication: :login
 domain: 'your.server.com'
 user_name: 'redmine@your.server.com'
 password: 'YourSecretPassword.600'
It’s time to bundle our Redmine:
bundle install --without development test
bundle exec rake generate_secret_token
RAILS_ENV=production bundle exec rake db:migrate
Then we’ll have to change ownership of /var/www/html/redmine
chown -R apache. /var/www/html/redmine
Configure Apache
It’s time to add VirtulaHost to Your Apache instance
<VirtualHost *:80>
 ServerName your.server.com
 ServerAlias www.your.server.com
 DocumentRoot /var/www/html/redmine/public

 <Directory /var/www/html/redmine/public>
   AllowOverride all
   Options -Multiviews
 </Directory>
</VirtualHost>
Now restart Apache and You’re good to go !
service httpd graceful
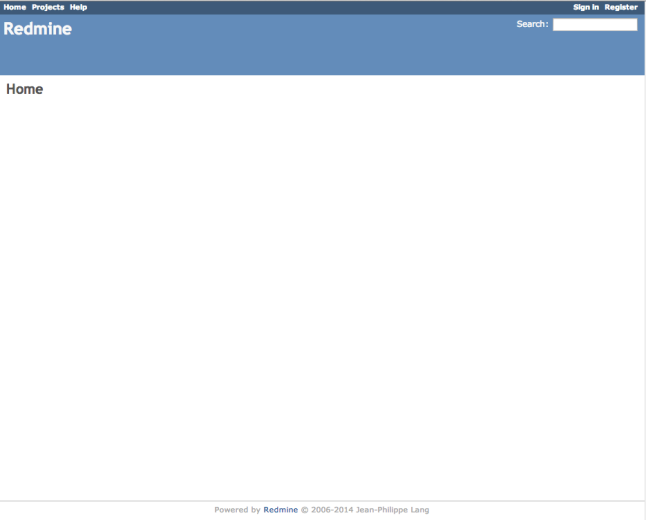
Yay! Now You can login by passing admin/admin credentials. Have Fun!

Zend Framework 1.x and Composer
Composer is a very useful tool for dependency management in PHP. Most of new and cutting edge frameworks like Zend Framework 2, Symfony 2, Laravel 4 etc. are designed to work with it very easily. Zend Framework 1 requires a little modifications.
Install Composer
Easiest way is just:
curl -sS https://getcomposer.org/installer | php
This will download composer.phar to current directory and You’ll be set to go.
If You however want to make composer a system-wide command, it’s pretty easy too:
mv composer.phar /usr/local/bin/composer
Now instead of using php composer.phar [command] , You can do simply: composer [command]
Zend Framework 1.x project
Let’s assume that we already have working ZF1 project and we’d like to switch it to composer.
cd ~/Projects/zf1-project
php composer.phar init

# alternatively if You've made composer system-wide
composer init
Now You’ll have to fill some details about Your current project and then composer will ask You about dependencies. Choose Interactive mode and search for package zendframework1 then enter the number for the line that matches zendframework/zendframework1. Then You’ll have to pass version of the library. If You want to have latest enter 1.*.
Next after another prompt about dependencies just hit return, and for next question answer ‘no’, because we don’t want to define any dev dependencies.
This should create file composer.json which looks similar to:
{
    "name": "genjusz/zf1-project",
    "description": "Zend Framework 1.x integration with Composer",
    "require": {
        "zendframework/zendframework1": "1.*"
    },
    "authors": [
        {
            "name": "Kuba Florczuk"
        }
    ]
}
Install dependencies
Now when we have our composer.json ready it’s time to install our library
php composer.phar install
This will create vendor directory in your project. It’s wise to add this to .gitignore if You maintain Your project with git.
Adjust project files
Last thing to do is modify Your public/index.php file and add this lines just above require_once 'Zend/Application' :
// Ensure library/ is on include_path
set_include_path(implode(PATH_SEPARATOR, array(
    realpath(APPLICATION_PATH . '/../library'),
)));

/** Composer autoloader */
if (file_exists(realpath(APPLICATION_PATH . '/../vendor/autoload.php'))) {
    require_once realpath(APPLICATION_PATH . '/../vendor/autoload.php');
}

/** Zend_Application */
require_once 'Zend/Application.php';
This will allow You to use any other libraries that You’ll install via Composer.

Directadmin: changing IP – IP FailOver
One of my servers is located in OVH datacenter. Recently one of my clients mailbox got hacked by spammer and started sending huge amount of spam. Server got of course blacklisted. After blocking some spamming networks, changing passwords to mailboxes I’ve started removing server from various blacklists. The only problem I’ve had was with Google. I’ve send them couple removal requests but didn’t succeed…
After a week I’m come out with a different approach. OVH offers service called IP FailOver. It’s main purpose is to have IP address that You can switch between Your main server and backup server when main is down. You just have to assign Your IP FailOver address to You network interface’s alias. It’s quite simple in RHEL 6 OS family:
cd /etc/sysconfig/network-scripts/
cp ifcfg-eth0 ifcfg-eth0:0
Then You just edit new file:
DEVICE="eth0:0"
BOOTPROTO="static"
IPADDR=IP.FAILOVER.ADDR
NETMASK=255.255.255.255
ONBOOT=yes
BROADCAST=IP.FAILOVER.ADDR
Now just run ifup eth0:0 and check if Your new address is responding to ping and we’re good to go further.
Now when we have our new IP address up and running we have to change it in DirectAdmin. Instructions can be found on DirectAdmin’s help website. In short: You have to first extend your license. You can do this by clicking on “Licensing / Updates” as admin user in Your Admin Tools section and select “Update license”. Then write e-mail to DirectAdmin support with request of changing Your IP to IP FailOver address. After You get a positive response just run:
cd /usr/local/directadmin/scripts
./getLicense.sh clientID license
service directadmin restart
./ipswap.sh old-ip new-ip
Now You just have to restart all services, and they will start responding to new IP Address.
There is only one problem with this setup… services are still sending stuff through old interface, so many servers will still recognise You as this old ip address. This means that You might have problem with downloading new license, because DirectAdmin requires connection from IP that license is registered to. There is also solution to this. We have to address all our traffic through IP FailOver address and this can be done by iptables:
iptables -t nat -A POSTROUTING -o eth0 -j SNAT --to-source new-ip-addr
Now everything should work as planned. There might be just one problem left to solve – when You’re using OVH’s FTP Backup service it requires Your server to connect through old IP address. Againg iptables will be helpful:
iptables -t nat -A POSTROUTING -o eth0 -d backup-server-ip-addr -j SNAT --to-source old-ip-addr
This is it!
There is also one big advantage of whole process – when You’ll want to change server it will be much simpler to just assign IP FailOver to the new one and You won’t have to worry about changing DA’s license IP.

Quick Tip: add-apt-repository in Ubuntu minimal 12.10
sudo apt-get install software-properties-common

Cheap Time Capsule alternative using Ubuntu 12.10
Why spent $260 for Time Capsule, when You can make Your Ubuntu to act exactly the same? Here is how to do this.
First we’re gonna install couple of things that we need for further setup:
sudo apt-get install avahi-daemon libavahi-client-dev libdb5.3-dev \
db-util db5.3-util libgcrypt11 libgcrypt11-dev
Then download the latest version of Netatalk – Open Source AFP fileserver. We’ll use netatalk 3.* because its much easier to setup as Time Capsule. Because the latest version in repositories is 2.2.* we’ll have to compile it by ourselves.
tar xvjf netatalk-3.*.tar.bz2
cd netatalk-3.*
./configure --with-init-style=debian --with-zeroconf
make
sudo make install
When everything is installed it’s time to do some configuration. First we’ll create a dir when we we’ll store all time machine backups.
sudo mkdir /media/Time-Machine/
Then we’ll add new user called timemachine, who will own this directory
sudo adduser timemachine
# here comes some data that You'll have to fill up
sudo chown -R timemachine. /media/Time-Machine
Now we’re ready to edit /usr/local/etc/afp.conf
;
; Netatalk 3.x configuration file
;

[Global]
; Global server settings

uam list = uams_guest.so, uams_dhx.so, uams_dhx2.so,

; [Homes]
; basedir regex = /xxxx

; [My AFP Volume]
; path = /path/to/volume

[Time Machine MediaPC]

path = /media/Time-Machine
time machine = yes
Then it’s time to configure avahi-daemon which will propagate our Time Capsule over the local network.
Let’s create /etc/avahi/services/afpd.service
<?xml version="1.0" standalone='no'?>
<!DOCTYPE service-group SYSTEM "avahi-service.dtd">
<service-group>
    <name replace-wildcards="yes">TimeCapsule %h</name>
    <service>
        <type>_afpovertcp._tcp</type>
        <port>548</port>
    </service>
    <service>
        <type>_device-info._tcp</type>
        <port>0</port>
    <txt-record>model=Xserve</txt-record>
    </service>
</service-group>
So let’s start everything
sudo service netatalk start
sudo service avahi-daemon start

# to ensure that netatalk will start on boot
sudo update-rc.d netatalk defaults
Now You can enjoy your fresh Time Capsule alternative for the cost of HDD :)
This guide should also work for Raspberry Pi, XBMCbuntu, Debian 6.

Git – submodules
We’re developing project which has 3 different apps with its own repositories. So we have repos of main app, node server, admin app. All of these we want to deploy to production server, so our project repo will have deployment scripts, puppet manifests and these 3 repos included. We achieve these goal by using git’s submodules:
// repo central server - RCS
mkdir project.git
cd project.git
git --bare init

// on deployment machine
git clone RCS:project.git
cd project
git submodule add RCS:main_app.git main_app
git submodule add RCS:node_server.git node_server
git submodule add RCS:admin_app.git admin_app
git commit -am 'Initial project commit'
git push origin master
Now You can create deployment scripts and also include them in project repository.
To clone this repository on another machine we use command:
git clone --recursive RCS:project.git
To pull changes from all submodules just type:
git submodule foreach git pull


